Here are a series of cushion (and a bolster) covers that I've made so far.

This is my first cushion cover, inspired by the lovely cupcake print material that I could not resist buying, especially when it was on offer. Not too perfect for a first attempt, the size of the cover ended up slightly smaller than expected. Thus the cushion cover was very 'tight-fitting' and the back of the cushion needed some buttons to make it stay close....hehehe.

This bolster case was pieced within hours as a gift for my cousin's 18 month old son Alexander. They had left his familiar bolster on the plane and were looking for a substitute to hug at night. I used a favourite piece of flannel fat quarter as the body and matching lilac ribbon. I have been wondering how to use up this cloth effectively. The cartoon prints were so cute that I felt it's not right to cut it up to use in patch work. So with this bolster case, I used up almost the whole piece without cutting it up to much. I hope my little nephew will like it.

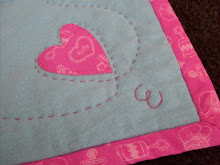
This 2nd cushion was made from scraps leftover from making the quilt. I decided to make a matching cushion and voila, it turned out quite well. I'm happy with the size and the final look.
I made this cushion cover using a large piece of red cloth, kindly donated by my mother. I had borrowed this book "Cushions and Throws" from the library, which featured very interesting self-made designs. I didn't exactly follow any of its designs, but was inspired enough to venture outside of the usual cotton to experiment with a soft material. I finally bought 4 red buttons recently and tried for the first time to sew button holes for this project.

I made this little pillow for my mother, including the cushion insert. She, like many people I know, also needs to hug a small pillow when she sleeps. I had borrowed this book on Appliques and there was a project to make felt bags. The circle flowers designs were appliqued onto the bags and I liked them a lot. I used some scrap materials and followed a similar design for this pillow. Nothing too difficult and very fun to make!


No comments:
Post a Comment